How to Make Car Seat Covers: Easy DIY Custom Guide
Are you tired of looking at worn-out or plain car seats that don’t reflect your style? You’re not alone—many people struggle with finding affordable ways to upgrade their car interiors.
Luckily, making your own car seat covers is easier than you might think and a great way to add a personalized touch.
To make your own car seat covers, start by choosing durable and comfortable fabrics like polyester or microfiber that match your interior style. Measure your seats carefully for a perfect fit, and gather essential tools like a sewing machine, scissors, and fabric chalk.
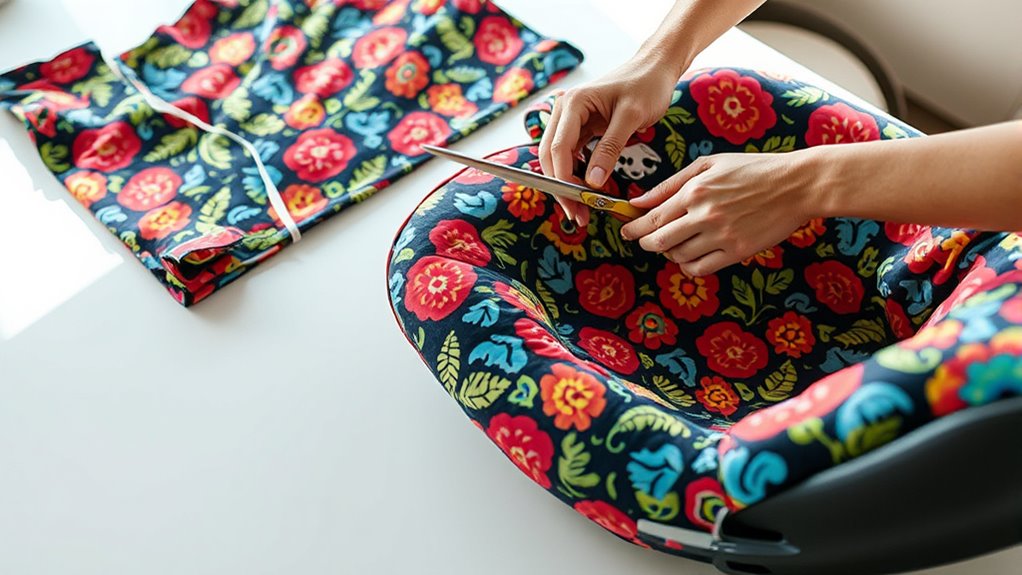
Cut your fabric, then sew with reinforced seams for strength. Secure the covers using adjustable straps and non-slip backing. For extra flair, personalize with patches or embroidery.
Keep your covers clean and well-maintained—discover all the tips to craft, customize, and install flawlessly.
Key Takeaways
- Pick durable, comfortable, and stylish fabric that’s easy to maintain for your car seats.
- Measure your seats carefully to ensure a snug, custom fit before you cut the fabric.
- Use sharp tools and proper sewing techniques, like reinforced seams, to make your covers last longer.
- Attach the covers with non-slip backing and adjustable straps to keep everything stable and fitting perfectly.
- Add a personal touch with embroidery or patches, and follow the right cleaning routines to keep your covers looking great for years.
How to Choose the Best Fabric for Your Car Seat Covers
When choosing the best fabric for your car seat covers, it’s important to think about durability, comfort, and style.
Durability is key because your seats face daily wear and tear. Go for tough materials like polyester or canvas that resist stains and rips.
Comfort matters too. Pick fabrics with a soft feel, like microfiber or leather, to keep your driving experience pleasant.
Style is also important for matching your vehicle’s interior. Think about color coordination—choose shades that complement your seats or add a pop of contrast.
Keep in mind that some fabrics are easier to clean and maintain, saving you time and effort.
Ultimately, balancing durability, comfort, and style helps you find a fabric that looks great and lasts long.
This thoughtful choice sets the foundation for a successful DIY car seat cover project.
How to Measure Your Car Seats for a Perfect Fit
Want to make sure your seat covers fit just right? The first thing you’ll want to do is measure the width of each seat carefully. It’s pretty straightforward—just grab a tape measure and note down the distance from one side to the other.
Next up, check out the depth of the seat—that’s how far it extends from the front to the back. Don’t forget to also measure the height and pay attention to any curves or contours. These details are super important because they help you pick covers that sit perfectly and stay comfortable.
Getting these measurements right means your new covers will look great and fit snugly, making your car’s interior look sharp and feeling cozy.
Measure Seat Widths Precisely
Accurately measuring your car seat’s width is key to making sure your custom seat covers fit just right. Start by noticing the seat shape—whether it’s contoured, flat, or bucket-style—as this affects the fit.
Use a flexible tape measure to find the widest part of the seat, usually across the front at your hips. Keep in mind that cushion thickness can impact the measurement, so measure over the thickest part of the cushion for a snug fit.
Make sure not to pull the tape too tight; it should sit comfortably against the seat’s surface. Precise measurements help you pick or create seat covers that fit your car’s unique shape and give a clean, professional look.
Determine Seat Depths Correctly
Measuring the depth of your car seat is key to making sure your custom covers fit smoothly from front to back. To get an accurate seat depth, use a tape measure and place it at the front edge of the seat cushion, running straight back to the seat’s rear edge.
Keep the tape level and snug but not tight. This measurement is important because it guarantees your cover will extend properly from the front to the back of the seat. When measuring, double-check by measuring a second time for accuracy.
Note Seat Height and Contours
Since seat height and contours directly affect how well your cover fits and how comfortable you’ll be, it’s important to note these details carefully. Proper measurements ensure your DIY seat cover aligns with your car’s seat shape and contour.
To do this effectively, start by measuring the total height from the seat base to the top, paying attention to any slopes or dips. Then, record the depth from the front to the back, considering any tapering.
Next, observe the side contours, especially where the upholstery curves inward or outward. Also, note the shape at the backrest and where the cushion meets for a snug fit.
Taking accurate notes makes it easier to create a custom cover that fits perfectly and feels comfortable every time.
What Tools and Materials Do You Need Before Starting?
Before you start sewing or installing your car seat covers, gather all the necessary tools and materials. Having the right supplies makes the process smoother and helps you achieve a professional look.
Choose fabrics based on durability, comfort, and ease of cleaning. Common options include neoprene, canvas, or polyester. Keep in mind, some fabrics may need specific tips for installation to get the best results.
Here’s a quick list of essentials:
| Tools & Materials | Purpose/Notes |
|---|---|
| Sewing machine or needle | To stitch fabric securely |
| Heavy-duty thread | For durability and strength |
| Scissors or rotary cutter | To cut fabric accurately |
| Measuring tape | To ensure a precise fit |
| Pattern or template | To guide fabric cutting and fitting |
Having these tools ready will make your DIY project straightforward. It helps you craft custom seat covers that last and look great.
Cutting and Preparing Fabric for Your Custom Covers
When you’re picking out fabric for your custom seat covers, it’s really important to choose something that’s both durable and comfortable. Options like canvas, neoprene, or leather are popular because they hold up well and look good too. Before you cut anything, make sure you measure your seats carefully and mark your fabric precisely. That way, you’ll get a perfect fit without any hassle. Taking your time with accurate measurements and neat cuts will make putting everything together much smoother and more enjoyable.
Selecting Suitable Fabric Types
Selecting the right fabric is key to making car seat covers that are both durable and comfortable. You’ll want to consider a few important factors to choose the best option.
First, look for fabrics that are sturdy enough to handle daily wear and tear. Next, think about colors and patterns that match your style and help hide stains over time.
It’s also good to pick fabrics with different textures that feel comfortable and let air flow through to prevent sweating. Lastly, consider eco-friendly materials that are easy to clean and maintain, while also keeping an eye on your budget.
Measuring and Cutting Accurately
To ensure your car seat covers fit perfectly, accurate measuring and cutting are key. Use precise techniques like measuring each seat section’s length, width, and contours to make sure your fabric pieces match your seats.
Mark your measurements clearly with fabric chalk or a fabric-safe marker. When it comes to cutting, use sharp scissors or a rotary cutter for clean, straight edges. Follow your marked lines carefully and cut slowly to avoid mistakes.
Remember to add seam allowances, usually about half an inch, around each piece. Double-check your measurements before cutting so you don’t make errors. Proper measuring and careful cutting will give you accurately shaped fabric pieces.
This will make assembly easier and help your custom seat covers fit securely.
How to Sew Durable and Strong Car Seat Covers
Creating durable and strong car seat covers starts with choosing the right materials. Pick fabrics that can handle daily wear and tear, like heavy-duty canvas, ballistic nylon, or reinforced polyester, which are known for their toughness. Test the fabric’s durability by checking how well it resists ripping, fraying, and fading over time.
Select tough, durable fabrics like ballistic nylon and reinforced polyester for long-lasting car seat covers.
To make sure your covers last, keep these tips in mind:
- Choose tightly woven fabrics with high thread counts for extra strength.
- Use double-stitched seams to prevent tearing at stress points.
- Reinforce edges and corners with extra layers of fabric or binding.
- Pick materials that are water-resistant or waterproof to boost longevity.
Attaching Your Seat Covers Securely to Prevent Slips and Wrinkles
Once you’ve sewn your seat covers with strong, durable materials, the next step is to attach them securely to your vehicle’s seats. To prevent slips and wrinkles, start by checking that each cover has a reliable non-slip backing. This material grips the seat surface and helps keep the cover in place, even during sharp turns or sudden stops.
Next, use the adjustable straps that come with your covers. These let you tighten or loosen the fit as needed for a snug, secure hold. Wrap the straps around the seat’s headrest, bottom, and sides, then fasten them tightly.
Make sure the straps aren’t too tight, so you don’t damage the fabric or seat. Double-check all attachment points, especially where the cover might shift or bunch up. Properly securing your seat covers with non-slip backing and adjustable straps keeps them smooth, in place, and comfortable.
This gives your car a fresh, custom look without slipping or bunching.
How to Personalize Your Car Seat Covers With Embroidery and Patches
Want to add a personal touch to your car seat covers? Embroidery and patches are perfect ways to showcase your style. First off, pick designs that really reflect your personality and match the vibe of your car’s interior. It’s all about making it uniquely yours!
Once you’ve got your design in mind, make sure your patches are firmly attached so everything stays put. Whether you’re sewing on embroidery or sticking patches, taking your time will help you keep that custom look looking sharp for a long time.
Choosing Embroidery Designs
Are you wondering how to choose the perfect embroidery designs for your car seat covers? Start by considering your overall style and pick design themes that match your personality.
Pay attention to color combinations that complement your fabric patterns and interior. Investigate different embroidery styles and stitching techniques to add texture and detail.
Think about placement options. Centered motifs work well, but asymmetrical designs can create a modern look. Choose motifs that reflect your interests, like sports, nature, or abstract patterns.
Personalization ideas, such as initials or symbols, add a unique touch. By balancing these elements, you’ll create eye-catching, cohesive designs that improve your car’s interior and showcase your personality.
Attaching Patches Securely
To guarantee your patches stay securely attached to your car seat covers, it’s essential to choose the right fastening method and follow proper application techniques. Start by carefully selecting your patch placement, making sure it’s centered and visible but also secure enough to handle daily wear.
Think about your design choices—larger patches might need stronger adhesives or stitching, while smaller ones are easier to sew on. If you’re sewing, use a sharp needle and strong thread, and make sure to secure the edges well.
For adhesive patches, press firmly and hold for a few seconds to activate the glue. Always test your patches on a small area first to avoid any damage.
With proper placement and a solid attachment method, your personalized design will look great and last longer.
Tips for Cleaning and Maintaining Your DIY Seat Covers
Maintaining your DIY car seat covers is key to keeping them looking fresh and working well. Proper care can extend their lifespan and help them stay vibrant. Here are some top tips:
Follow the washing instructions carefully. Use gentle cycles and mild detergents to protect the fabric’s color and overall condition.
Always follow the washing instructions with gentle cycles and mild detergents to preserve your seat covers.
Regularly check your covers for tears or loose stitching. Fix any issues quickly to stop them from getting worse.
Use stain removal techniques suited for your fabric type, and consider fabric refreshers to keep the covers smelling nice.
Protect your covers from too much sun exposure. When possible, use seat protectors or liners to shield them from damage.
Sticking to these tips will help your DIY seat covers stay durable, colorful, and comfortable. Proper cleaning and care not only improve their look but also keep the fabric in good shape over time.
Troubleshooting Fit and Installation Problems
Even with careful planning, you might run into fit and installation issues when putting in your DIY car seat covers. To fix fit adjustments, start by loosening or tightening the cover’s straps and elastic hems so they better match your seat’s shape.
If the cover feels too tight, gently stretch it over the seat, making sure the fabric isn’t strained or torn. For loose areas, use extra fasteners, clips, or hooks to secure the cover firmly in place.
When you face installation difficulties, review your technique. Align the cover properly and work gradually from the top down. Sometimes, removing headrests or adjusting seat positions can help improve the fit.
Patience is key, so don’t rush the process. Proper installation means the cover is smooth without wrinkles and all attachments are secure. With these tips, you’ll get a snug, professional-looking fit and avoid common frustrations.
Creative Ideas to Make Your Car Seats Stand Out
If you want your car seats to truly stand out, there are plenty of creative ways to personalize their look. Start by experimenting with bold color combinations and pattern mixing for a vibrant, eye-catching effect. Incorporate unique textures, like quilted fabrics or faux fur, to add depth and tactile interest.
Seasonal themes, such as holiday motifs or summer-inspired designs, make your covers timely and fun. Playful designs, like cartoon characters or geometric shapes, inject personality into your space. Artistic embellishments, like embroidered details or painted accents, add a custom touch.
You can also opt for themed covers that match your personality or vehicle style. Furthermore, upcycled materials like repurposed fabric scraps or old clothing create eco-friendly, one-of-a-kind covers. Combining these ideas allows you to craft seats that reflect your style while standing out from the crowd.
Frequently Asked Questions
Can I Make Seat Covers for Any Type of Car Seat?
Yes, you can make seat covers for almost any type of car seat. Just keep in mind the fabric types that suit your climate and how you plan to use them, like waterproof or breathable materials.
Your pattern choices are pretty flexible, so you can customize designs to fit different seat shapes and sizes. Just make sure to measure your seats carefully.
Then, select or adapt patterns to fit your specific vehicle. This way, you’ll get a snug, professional-looking fit that looks great and stays in place.
How Long Does It Take to Complete a DIY Car Seat Cover?
It usually takes about 2 to 4 hours to complete a DIY car seat cover, depending on your fabric choice and design ideas. If you pick a simple fabric and a straightforward style, you’ll probably finish faster.
But if you’re going for intricate patterns or multiple layers, it might take a bit longer. Be patient and enjoy customizing your seat with your favorite fabric and style.
It’s a rewarding project that can fit into your schedule, and the end result is totally worth it.
Are There Eco-Friendly Fabric Options Available?
Yes, eco-friendly fabric options are available for your DIY car seat covers. You can choose sustainable materials like organic cotton, hemp, or bamboo, which are biodegradable and renewable.
Look for fabric types treated with eco-friendly dyes that reduce chemical impact. These options help minimize environmental harm while providing durable, comfortable covers.
Can I Wash and Reuse My DIY Seat Covers?
Absolutely, you can wash and reuse your DIY seat covers! Just pick a durable fabric like heavy-duty cotton or environmentally friendly materials.
Follow simple maintenance tips like gentle washing and air drying to keep them in good shape. Think of your covers as superheroes—ready to save the environment, your budget, and your time again and again.
With proper care, your fabric choice will keep your covers fresh, vibrant, and reusable. This makes your car interior eco-friendly and stylish for the long haul.
What Safety Considerations Should I Keep in Mind?
When making your DIY car seat covers, prioritize safety by choosing materials that are fire-resistant and non-toxic.
Make sure all fittings are secure and snug to prevent slipping or bunching while you’re driving.
Avoid sharp edges or loose threads that could cause discomfort or pose hazards.
It’s important to regularly check the covers for any signs of wear and ensure fittings stay secure, especially after cleaning.
This helps keep your covers safe and durable for the road.
Conclusion
With a little patience and creativity, you can create custom car seat covers that truly reflect your style.
Remember, “practice makes perfect,” so don’t be discouraged if your first attempt isn’t flawless. Keep experimenting with fabrics, techniques, and personalization ideas.
Before you know it, you’ll have a comfortable, stylish ride that stands out on the road. Making your own car seat covers is a fun project that adds a personal touch to your vehicle.
Happy sewing, and enjoy the satisfaction of a job well done!