How to Fix Hole in Leather Car Seat: Easy DIY Repair Guide
Few things can be more frustrating than spotting a hole in your leather car seat. You’re not alone—many people struggle with keeping their seats looking new and pristine.
The good news is, fixing that hole doesn’t have to be complicated or expensive.
To fix a hole in your leather car seat, start by evaluating the damage and gathering the right tools like leather filler, dye, and a clean cloth.
Clean and lightly sand the area, then carefully apply the filler to smooth out the hole. Match the color with dye and seal the repair.
Afterward, use a leather conditioner to keep the surface soft.
For detailed steps on perfecting your repair, investigate more tips and tricks in the guide.
Key Takeaways
- Check out the size and depth of the hole to decide if you can fix it yourself or if you should call in a pro.
- Clean the area thoroughly so the repair materials stick properly.
- Use leather filler to smooth out the hole, then match the color with dye for a seamless look.
- Finish up with a sealant and leather conditioner to protect the repair and keep the leather flexible.
- If the hole is big or deep, it’s best to get professional help for a durable and good-looking fix.
Do You Need to Repair Your Leather Seat? How to Assess Damage
Wondering if your leather car seat needs repair? Start by evaluating the damage carefully. Understanding factors like exposure to sunlight, temperature changes, and daily wear helps you decide if repairs are needed.
Inspect the affected area for cracks, tears, or holes. If the damage is minor, like surface scratches or small cracks, it might just need conditioning or polishing.
But larger tears or holes usually require more extensive repairs. Think about how the damage affects comfort and appearance—if it’s bothering you or looks unsightly, it’s probably time to fix it.
Also, consider whether the damage could get worse over time, leading to more costly repairs down the line. If you’re unsure, it’s a good idea to consult a professional for an honest evaluation.
Gather the Right Tools and Materials for Repair
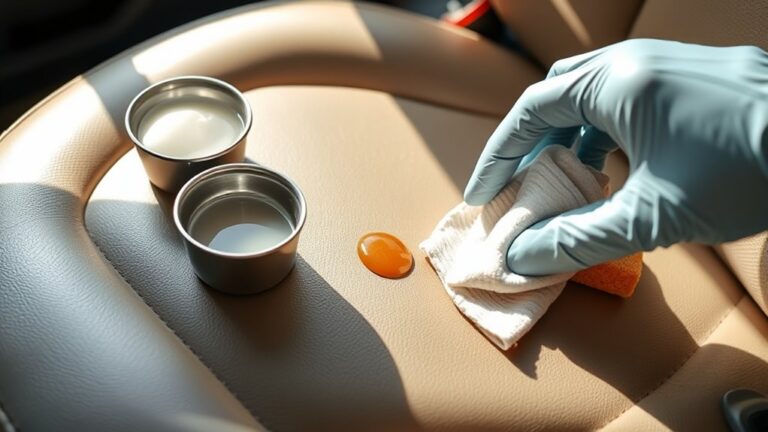
Once you’ve checked out the damage to your leather seat, the next step is to gather the right tools and materials to ensure your repair goes smoothly. Start with essential items like a clean cloth, fine-grit sandpaper, and a spatula or palette knife for applying repair compounds.
You’ll also want to gather repair supplies such as leather filler, color-matching dye, and a leather conditioner to blend the repair seamlessly. Having everything ready beforehand helps prevent delays and keeps the process hassle-free.
Make sure to pick high-quality repair products made specifically for leather to get a durable, natural-looking fix. If you think you’ll do more repairs down the line, investing in a complete leather repair kit can be a smart move.
How to Choose the Best Leather Repair Kit or Patch
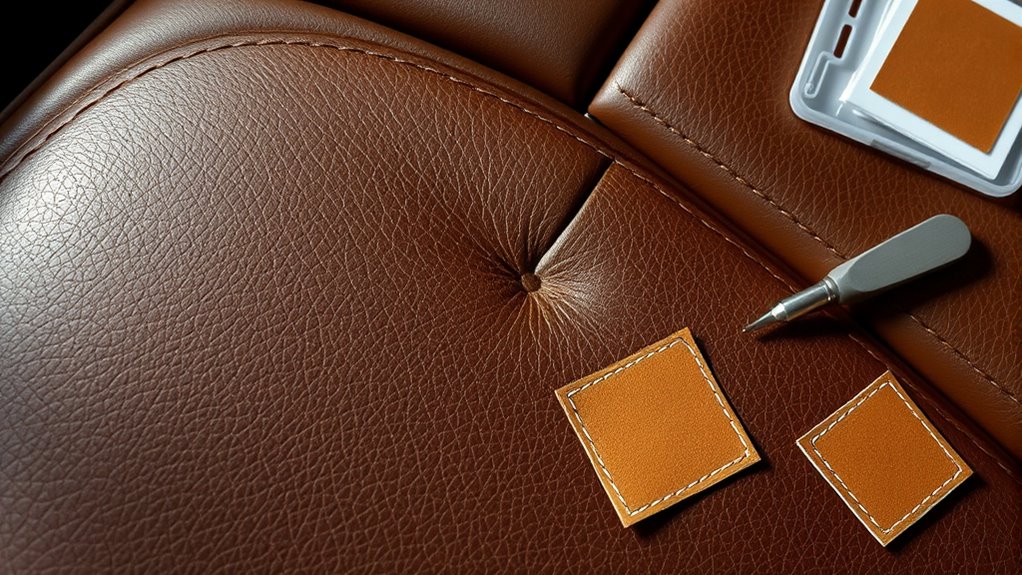
Choosing the right leather repair kit or patch is key to getting a seamless and long-lasting fix. First, think about the types of kits available—some come with color-matched compounds, while others have patches for larger holes.
If your seat has minor scratches or small tears, a kit with color blending and adhesive works best. For bigger holes, look for patches that can blend well and have a flexible, durable adhesive.
Durability is important, so pick a kit with high-quality compounds that resist cracking, peeling, and fading over time. Make sure the repair materials are compatible with your leather, whether it’s genuine or synthetic.
Reading reviews and product descriptions can help you gauge how effective and long-lasting the repair will be. In the end, choosing a kit with the right mix of repair options and durability will keep your seat looking good and holding up to daily use.
Clean and Prepare the Damaged Area for Repair
Before you start repairing your leather seat, it’s really important to clean and prepare the damaged area first. Use a soft cloth and a leather cleaner or a mild soap mixed with water. Avoid harsh chemicals that could damage the leather even more.
Wipe away dirt, oils, and debris so the surface is completely clean. Surface prep is key for a smooth repair; lightly buff the area with a fine-grit sponge or cloth to remove loose fibers or rough spots.
Ensure the surface is spotless and lightly buffed for a smooth, seamless leather repair.
This helps the repair material stick better and creates a smooth base. Make sure the area is fully dry before moving on. Proper cleaning and prep not only help the repair stick but also help it blend seamlessly with the surrounding leather.
Taking the time to prep the surface properly sets you up for a successful, long-lasting fix.
Step-by-Step: Filling Small Holes and Tears in Leather
Sure! Here’s a more conversational version of the text:
So, first things first, you’ll want to prep the leather surface. Just give it a good clean and make sure to remove any loose fibers or debris. This step is super important because it helps the filler stick properly.
Once everything’s nice and clean, you can go ahead and apply the leather filler. Just spread it smoothly over the holes or tears to bring back that nice, even look of your seat.
Preparing the Leather Surface
Preparing the leather surface is a crucial first step before filling any holes or tears. Proper surface prep ensures the repair sticks well and looks seamless.
Start by cleaning the area thoroughly with a soft cloth and a leather cleaner. Remove dirt, oils, and debris that could interfere with adhesion. Once it’s clean, dry the surface completely.
Next, inspect the area for loose fibers or rough spots. Lightly sanding these with fine-grit sandpaper can create a smoother surface. Just be careful not to damage the leather further.
Good cleaning and careful prep set the stage for a durable, professional-looking repair. Skipping this step can cause poor adhesion and make imperfections more noticeable.
Applying Leather Filler
Start by scooping out a small amount of leather filler with a palette knife or spatula, then press it firmly into the hole or tear. Use your fingers or a tool to smooth the filler, ensuring it’s flush with the surrounding leather.
For the best results, focus on proper filler application techniques. Avoid common mistakes like overfilling or uneven spreading.
Follow the manufacturer’s instructions carefully. Work in thin layers for better adhesion.
Use a spatula to smooth out excess filler and let each layer dry before applying the next.
After drying, sand lightly for a seamless finish. Paying close attention to your application technique helps achieve a durable, nearly invisible repair.
Matching Leather Color and Finish for a Seamless Look
To make your repair blend seamlessly, it’s important to match the leather color and finish as closely as possible. You can do this by using color matching techniques like mixing dyes or comparing your leather to a color chart. Take your time with this step—it really makes a difference in how natural the repair looks.
Once you’ve got the perfect color match, finish things off with the right sealants and finishing touches. This helps ensure your repair not only looks natural but also stays durable over time. With a bit of patience, you’ll have a seamless, professional-looking repair that blends right in.
Color Matching Techniques
Matching the leather color and finish is key for a seamless repair that blends naturally with the rest of your seat. Focus on color blending by carefully choosing and applying your leather dye or paint.
Start with tint testing on a hidden area to make sure the shade matches perfectly before working on the visible section. Adjust the tint gradually, mixing small amounts to avoid overshooting.
Use a color chart or reference photo for accuracy. Test different shades on scrap leather first so you can see how they look.
Apply thin, even layers for smooth blending. Keep track of your tint adjustments so you can be consistent throughout the process.
Let each layer dry fully before adding more to achieve the best results.
Finishing Touches and Sealants
Once you’ve achieved a consistent color match, applying finishing touches and sealants is key to making your repair look seamless and last longer. Finishing techniques help blend the repaired area with the surrounding leather, giving it a natural look.
Use a fine brush or sponge to apply a thin layer of sealant designed specifically for leather. Sealants protect your repair from moisture, UV rays, and everyday wear, which helps extend its lifespan.
Choose a sealant that matches your leather’s finish—whether glossy or matte—and apply it evenly. Make sure each layer dries completely before adding another to avoid smudges or unevenness.
This step not only improves how the repair looks but also strengthens it against future damage. Proper finishing and sealant application make your repair nearly invisible and much more durable.
How to Apply Leather Conditioner After Repair
After completing the repair, it’s important to apply leather conditioner to bring back moisture and flexibility to the patched area. Conditioning helps prevent cracking, keeps the leather soft, and improves how it looks.
To get the best results, use gentle, even strokes when applying the conditioner and avoid using too much. This way, you won’t oversaturate the leather or leave uneven spots.
Here are some key points to keep in mind:
- Make sure to clean the repaired area thoroughly before applying the conditioner.
- Use a soft cloth or applicator for smooth, even coverage.
- Apply a small amount of conditioner and work it into the leather gently.
- Let it sit for a few minutes so the leather can absorb it fully.
- Finish by buffing the surface with a clean cloth for a nice, smooth finish.
Common Mistakes to Avoid When Repairing Leather Seats
One common mistake to avoid is rushing the repair process, which can lead to uneven patches and visible seams. Many beginners think quick fixes will save time, but patience really guarantees a smoother finish.
Don’t fall for the misconception that you can perfectly match the color or texture on your first try. It often takes practice and small adjustments to get it right.
Another beginner error is applying too much filler or adhesive at once, which can cause bubbling or cracking later on. Be sure to prepare the surface thoroughly and follow the instructions carefully.
Always test your color match on a hidden area first. This helps prevent surprises after the repair and ensures a better match.
Finally, don’t skip proper drying time. Rushing the curing process can compromise the durability of your repair. Take your time between steps for the best results.
Staying patient and attentive helps you avoid common mistakes and results in a cleaner, more professional-looking repair.
When to Consider Professional Leather Restoration
If your leather is really damaged or starting to look pretty worn out, it’s probably time to bring in a professional. Trying to fix it yourself without the right skills or tools can sometimes make things worse instead of better. So, it’s good to know when the job might be a bit too much for you—that way, your seat gets the proper care it needs to look great again.
Extent of Damage
Small holes or minor surface scratches can often be fixed with DIY methods. But when the damage starts to affect a larger area or weakens the leather’s strength, it’s time to think about professional restoration.
The decision depends on the size of the hole and the type of damage. Larger tears or deep gouges usually need expert help. If the damage goes beyond a small patch or affects the structure, DIY fixes probably won’t look or hold well.
Consider professional repair if you notice extensive cracking or splitting, multiple holes or scratches close together, or damage that exposes foam or backing material. Loss of leather flexibility or strength and significant discoloration or fading around the damage are also signs.
When damage surpasses these points, a professional restoration will ensure durability and a seamless look.
Leather Age and Condition
As leather ages, it naturally loses its suppleness, becomes more brittle, and may develop cracks or fading. Recognizing these signs is key to deciding whether DIY repairs will do the trick or if you should call in a professional.
Start by inspecting the leather for deep cracks, significant discoloration, or extensive wear. If your leather seat shows advanced aging signs, trying to fix it yourself might not bring back its original look or durability.
In such cases, professional leather restoration is usually a better choice. They can handle deep cracks, severe fading, or extensive damage more effectively. Knowing when to seek expert help ensures your seat gets the proper care it needs.
This way, you’ll preserve its appearance and help it last longer. Always evaluate how far the aging has gone before choosing the best repair approach.
Skill Level Required
When figuring out if you can repair your leather car seat yourself, think about how bad the damage is and how skilled you are. Small scratches or tiny tears might be doable with some basic DIY tricks, but bigger holes or lots of wear usually need a pro.
If you’re new to leather repairs, trying complicated DIY methods could make things worse. Consider hiring a professional if the damage is deep or widespread, or if you don’t feel confident in your repair skills.
A professional fix is better if you want it to look seamless and last a long time. This is especially true if the repair involves matching the color or texture perfectly or if you’re unsure about the right products or techniques.
Knowing when to call in an expert saves you time and frustration and ensures the repair looks good and holds up well over time.
Tips to Maintain Your Leather Seats and Prevent Future Damage
Maintaining your leather seats is key to preventing damage and keeping them looking great. Regular cleaning with gentle products helps remove dirt and oils that can cause wear over time.
Keeping your leather seats clean and gentle care prevents damage and preserves their appearance.
Applying protective treatments creates a barrier against stains and UV rays, which can extend your seat’s life. Moisture control is also important—avoid excess water when cleaning and wipe up spills quickly to prevent stains and cracks.
Temperature regulation is helpful too. Park in shaded spots or use sunshades to stop the leather from drying out or cracking in extreme heat. Be careful with sharp objects that could puncture or scratch the surface.
Regular inspections let you catch early signs of wear or damage, making repairs easier. When dealing with stains, act fast with the right cleaning solutions to prevent permanent discoloration.
Consistent care and attention will keep your leather seats durable, comfortable, and looking like new for longer.
Frequently Asked Questions
How Long Does a DIY Leather Repair Typically Last?
A DIY leather repair usually lasts between one to five years, depending on repair quality and leather maintenance. If you use proper techniques and materials, the repair can be quite durable.
Regularly cleaning and conditioning your leather seat helps preserve its integrity and repair longevity. Avoid excessive sun exposure and harsh chemicals, which can weaken the repair over time.
With proper care, you can extend the life of your DIY fix considerably.
Can I Repair Larger Holes or Extensive Damage Myself?
Yes, you can repair larger holes or extensive damage yourself by using the right repair techniques and patch materials. Start by cleaning the damaged area thoroughly.
Next, cut a patch that matches your leather’s color and texture. Use leather adhesive or filler to secure the patch, carefully blending the edges.
For the best results, follow detailed tutorials and consider practicing on scrap leather first. This helps you perfect your technique before working on the actual piece.
Is It Safe to Use Household Products for Leather Repair?
Using household products for leather repair isn’t the safest choice because they can sometimes cause more harm than good. Instead, use proper leather care and repair kits made specifically for this purpose. These kits contain materials that won’t damage your seat.
While household items might seem tempting, sticking to dedicated leather repair products is the best way to keep your seat looking its best. It also helps maintain its durability over time.
How Do I Prevent Future Tears in My Leather Seat?
To prevent future tears in your leather seat, regularly follow leather maintenance tips like cleaning and conditioning your seat with quality products. Applying protective coatings can also help create a barrier against scratches, spills, and wear.
Try to avoid sharp objects and excessive sun exposure, as these can damage the leather over time. Address any minor damages promptly to prevent them from getting worse.
What Are Signs That Professional Repair Is Necessary?
When your leather seat starts to show cracks that look like a sun-dried riverbed or tears that seem ready to come apart, it’s a sign you should get professional repair. If the damage looks deep or widespread, it’s best to call in an expert to assess the situation and handle the repairs.
Signs like fading, serious cracking, or large tears mean your seat needs a professional’s touch to bring back its look and strength. Don’t wait until the damage takes over completely—getting help early can save you time and money.
Conclusion
Remember, your leather seats reflect how much care you put into your car.
Just like a small tear can catch your eye unexpectedly, a simple repair can bring back their original beauty and give you peace of mind.
Sometimes, it’s the little things, like applying a patch carefully or using a good conditioner, that make a big difference.
Paying attention to these details shows how much you value your car’s interior.
Next time your seat shows signs of wear, trust your skills and instincts.
Fixing a hole in your leather car seat might be easier than you think, and it can be more rewarding than you expected.