How to Fix Coolant Reservoir Overflow: Complete Guide
Many car owners find themselves frustrated when their coolant reservoir starts overflowing. It’s a common issue that can seem confusing or intimidating to fix on your own. Don’t worry—you’re not alone, and there are simple steps you can take to solve it.
If your coolant reservoir is overflowing, start by checking the coolant level and condition when the engine is cool. Look for leaks, cracks, or blockages in your cooling system, and verify the radiator cap seals properly.
If you notice overheating or pressure issues, drain the old coolant safely, refill with the correct mixture, and inspect for leaks. Regular maintenance prevents future problems.
Keep going to uncover detailed steps and tips that can help you fix it effectively.
Key Takeaways
- Check and replace the faulty radiator cap or relief valve to keep the pressure just right.
- Inspect hoses, the radiator, and the reservoir for leaks, cracks, or blockages.
- Make sure the coolant levels are correct and the coolant itself is in good shape; top it up if needed.
- Test the cooling system pressure to find any loss or blockages.
- Regularly check the system and fix any overheating issues as soon as they come up.
What Causes Coolant Reservoir Overflows?
Coolant reservoir overflows often happen when the cooling system faces pressure that exceeds its capacity. This increased coolant pressure can result from a malfunctioning radiator, which normally helps dissipate heat and keep pressure levels in check.
When the radiator isn’t working properly—due to clogs, leaks, or a broken thermostat—heat builds up and raises the coolant pressure. As pressure climbs, the coolant expands and pushes into the reservoir.
If the reservoir cap isn’t sealing properly or if the relief valve is faulty, the excess pressure has nowhere to go, causing an overflow. A failing radiator fan can also prevent proper cooling, leading to higher pressure and potential overflow.
Over time, these issues weaken the radiator’s ability to regulate coolant pressure effectively, increasing the chances of overflow. Knowing these causes can help you identify the root problem and prevent further damage to your vehicle’s cooling system.
How to Check Your Coolant Level and Condition
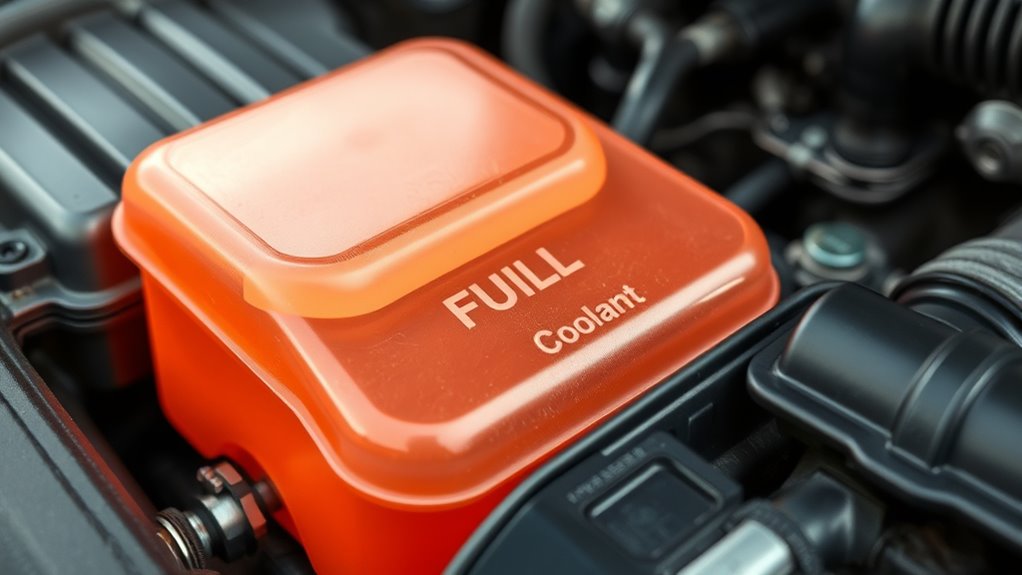
It’s a good idea to check your coolant level regularly to make sure it’s within the right range. Just pop the hood and look at the coolant reservoir—it’s usually a transparent tank with markings that show the minimum and maximum levels. If it’s low, you’ll want to top it up with the right type of coolant.
Also, don’t forget to check the condition of the coolant itself. Take a quick look at its color and clarity—if it’s murky, discolored, or has debris floating around, that’s a sign it might need replacing. Keeping an eye on both how much coolant there is and what it looks like can help prevent overheating issues and keep your engine running smoothly.
Inspect Coolant Quantity Regularly
Regularly inspecting the coolant level is essential to prevent overflow and keep your engine running smoothly.
Consistent coolant maintenance helps you catch low levels before they cause problems.
Check the reservoir when the engine is cool to get an accurate reading.
The coolant should be between the “MIN” and “MAX” marks on the side of the tank.
If it’s below the minimum, top it off with the correct type of coolant.
Avoid overfilling, as excess coolant can lead to overflow.
Keep an eye on the condition of the coolant as well; clarity and a consistent color indicate good health.
Regular inspections allow you to address minor issues early, preventing larger problems and enabling effective overflow prevention.
Assess Coolant Quality Properly
Checking the coolant’s quality is essential for keeping your engine healthy and avoiding overflow issues. Start by looking at the coolant’s color and clarity—discolored or cloudy coolant means contamination.
Next, check the coolant level against the markings on the reservoir. Be aware that different coolant types shouldn’t be mixed, as incompatible mixtures can cause problems.
Think about the coolant additives too. If they’ve broken down, corrosion inhibitors might not work effectively. Finally, give the coolant a sniff—sweet or burnt odors can signal contamination or overheating.
Regularly testing the coolant with a refractometer or test strips helps you keep track of its effectiveness. Proper coolant quality ensures your engine runs smoothly and prevents issues caused by breakdown or improper mixing.
Signs Your Cooling System Is Failing
When your cooling system starts to fail, certain warning signs become clear that can help you catch the problem early. One key indicator is fluctuating or consistently high coolant temperature readings. If your temperature gauge spikes or stays in the red zone, it means your radiator isn’t cooling the engine properly.
You might also notice frequent overheating, especially during stop-and-go traffic or hot weather. Reduced radiator efficiency can cause coolant to boil over or spill from the reservoir, leading to overflow issues. Unusual smells, like sweet or burning odors, can also indicate coolant leaks or overheating.
Additionally, if you see coolant puddles under your vehicle or white smoke from the exhaust, these are strong signs of cooling system problems. Being aware of these signs helps you address potential issues early, preventing further damage and keeping your cooling system running smoothly.
How to Safely Drain and Refill the Coolant Reservoir
To safely drain and refill your coolant reservoir, start by letting the engine cool completely. This helps prevent burns from hot coolant or steam.
Once cooled, find the reservoir and carefully open the cap slowly to release any built-up pressure.
Drain the old coolant by either removing the drain plug or siphoning it out through the hose. When refilling, use the correct coolant types specified for your vehicle to ensure proper maintenance.
Next, mix coolant and distilled water if needed, following your manufacturer’s recommendations. Pour the mixture slowly into the reservoir, filling it to the designated level.
Make sure to replace the cap securely to prevent leaks. Then start the engine and let it run to circulate the new coolant.
Check for leaks and verify the coolant level afterward. Always use the right coolant types for your vehicle to avoid damage and keep your cooling system working properly.
Inspecting for Leaks and Blockages in Your Cooling System
After refilling the coolant reservoir and starting your engine, it’s important to check your cooling system for leaks and blockages that could cause problems. First, look for visible signs of leaks around hoses, the radiator, and the reservoir. Keep an eye out for crusty deposits or wet spots that might indicate a leak.
Next, observe the coolant flow. With the engine running, carefully open the radiator cap and see if the coolant circulates smoothly. This helps you confirm that the system is working properly.
To be thorough, perform a pressure test using a cooling system pressure tester. This can reveal hidden leaks or weak spots that aren’t obvious at first glance. Regular inspections like this help keep your cooling system running efficiently and prevent overflow issues.
Here’s a quick overview:
| Step | What to Check | Why It Matters |
|---|---|---|
| Visual Inspection | Leaks, cracks, wet spots | Detects obvious leaks |
| Coolant Flow Check | Movement of coolant in radiator | Confirms proper circulation |
| Pressure Testing | System pressure consistency | Finds hidden leaks |
Performing these checks regularly will help ensure your cooling system stays in good shape and prevents potential problems.
When to Replace the Coolant Reservoir or Cap
You should think about replacing the coolant reservoir or cap if you notice cracks, corrosion, or any kind of damage. These issues can lead to leaks, which isn’t good for your cooling system.
If the cap isn’t sealing properly anymore or the reservoir looks worn out, it’s probably time to get a new one. Taking care of these parts helps keep your cooling system working efficiently and can prevent overflow problems down the line.
Signs of Wear
A cracked or damaged coolant reservoir or cap is a clear sign that it’s time for a replacement. Over time, signs of wear become obvious through coolant leaks around the reservoir or cap, indicating deterioration.
You might notice the reservoir becoming cloudy or discolored, which suggests age and potential failure. Cracks or warping can compromise reservoir maintenance, leading to coolant spills and overflow issues.
Also, if the cap doesn’t seal tightly, pressure buildup can cause overflow or leaks. Keep an eye out for:
- Visible cracks or warping
- Persistent coolant leaks
- Discolored or cloudy reservoir
- Loose or damaged cap
Addressing these signs promptly helps prevent further damage and guarantees your cooling system functions properly. Regular inspection can save you from bigger repairs down the line.
Proper Replacement Timing
Knowing when to replace your coolant reservoir or cap is key to keeping your cooling system in good shape. If you notice persistent coolant leaks, frequent overflow, or if the cap shows signs of cracking or corrosion, it’s time to replace them.
Regularly checking these parts helps prevent overflow issues. Replace the reservoir or cap promptly if they no longer seal properly, since faulty parts can lead to overheating.
Don’t wait for signs like overheating or low coolant levels before acting. Regular inspections and timely replacements ensure your cooling system works efficiently.
How to Test for Overheating and Cooling Pressure Problems
To accurately diagnose overheating and cooling pressure issues, start by watching your vehicle’s temperature gauge for any unusual fluctuations or high readings. This is your first sign that something might be wrong in the cooling system.
Next, perform cooling system diagnostics by checking for leaks, damaged hoses, or a faulty thermostat. Pressure testing is important—use a cooling system pressure tester to pressurize the system and see if it holds pressure.
If the system doesn’t hold pressure, leaks or a failing radiator cap could be the cause. Also, listen for hissing sounds that might indicate pressure loss. After driving for a bit, monitor the temperature; if it rises quickly or fluctuates, you’ll want to investigate further.
Be sure to check for visible leaks around hoses and the radiator. Use a pressure tester to verify the system’s integrity. Keep an ear out for hissing or bubbling sounds during engine operation, as these can point to pressure issues.
Lastly, observe the temperature gauge and listen for unusual sounds to get a clear idea of what might be happening in your cooling system.
Troubleshooting Persistent Coolant Overflow
If your coolant keeps overflowing, the first thing you want to do is check the radiator cap seal. Make sure it’s not damaged or sitting improperly—that can cause pressure issues leading to overflow. After that, take a look around the hoses and the reservoir to see if there are any leaks or cracks. Sometimes, small leaks can cause the coolant to escape and overflow.
It’s also a good idea to keep an eye on your coolant levels regularly. By checking often, you can catch any problems early before they turn into bigger issues. That way, you can address the root cause and avoid further overflow troubles.
Check Radiator Cap Seal
Begin by inspecting the radiator cap carefully. The seal must be intact and free of cracks or wear. A damaged cap seal can cause coolant overflows because it doesn’t regulate pressure properly.
Check for cracks, tears, or deformities on the rubber seal. Also, look for rust or debris that might prevent the cap from fitting tightly. Make sure it fits snugly on the radiator neck.
Look for signs of corrosion or buildup around the cap. If you notice any damage, replacing the cap is essential for good radiator maintenance. A faulty cap can cause pressure issues that lead to coolant spilling over.
Always choose the correct replacement cap for your vehicle. Ensuring the seal is in good condition helps maintain proper pressure, preventing coolant leaks and keeping your cooling system working efficiently.
Inspect for Leaks
Multiple leaks in your cooling system can lead to persistent coolant overflow, so it’s important to thoroughly inspect your vehicle for any signs of leaks. Start by examining hoses, clamps, and connections for cracks, holes, or corrosion.
Check around the radiator, water pump, and thermostat housing for drips or stains. Different coolant types, like glycol-based or extended-life formulas, may leak differently, so be sure to identify the specific fluid.
Inspect the coolant reservoir and its cap for cracks or damage, as these are common leak sources. Look for wet spots, puddles, or white residue that indicate a leak.
Use a flashlight if needed, and consider pressure testing the system to find hidden leaks. Identifying and fixing these leaks will help prevent coolant overflow issues.
Monitor Coolant Levels
After inspecting your cooling system for leaks, the next step is to keep a close eye on the coolant levels regularly. Monitoring coolant levels helps with proper coolant maintenance and prevents overflow issues.
Check the reservoir at least once a week, especially during temperature fluctuations. Look for sudden drops or rises in coolant levels, which can indicate underlying problems.
To stay ahead of potential overflow, consider these tips: Keep the coolant within the recommended level on the reservoir. Top off with the correct coolant type if levels are low.
Watch for signs of contamination or discoloration. Address any irregularities immediately to avoid overheating or engine damage.
Consistent monitoring helps you catch problems early, reducing the risk of persistent coolant overflow and keeping your vehicle’s cooling system healthy.
Tips to Prevent Your Coolant Reservoir From Overfilling
To prevent your coolant reservoir from overfilling, regularly check the coolant level and make sure it stays within the recommended range marked on the tank. It’s a good idea to inspect the reservoir during routine vehicle checks and only refill when necessary.
Pour coolant slowly and stop once it reaches the maximum fill line. This helps prevent excess fluid from expanding and spilling out when the engine heats up. Keep the radiator cap tightly sealed to maintain proper pressure and reduce the risk of overflow.
Also, check that the cooling system is free of leaks or blockages that could cause pressure to build up. Using the correct type of coolant as specified in your vehicle’s manual helps keep everything running smoothly.
When to Seek Professional Help for Cooling System Issues
Ever wonder when it’s time to call in a professional for your cooling system? If you notice persistent overheating, frequent coolant leaks, or if your coolant level keeps dropping despite proper maintenance, it’s a sign you need expert help. Ignoring these issues can lead to severe engine damage.
When you suspect a problem beyond simple coolant maintenance, it’s best to seek professional diagnostics. Consider reaching out if you experience continuous overheating even after topping off coolant or cracks and leaks in the radiator or hoses.
Unusual coolant discoloration or contamination, or warning lights on your dashboard related to engine temperature, are also signs. A professional can properly diagnose the root cause, whether it’s a failing water pump, thermostat issues, or a faulty radiator cap.
Trusting experts guarantees your cooling system gets the necessary repairs, preventing costly damage and keeping your vehicle running smoothly.
Frequently Asked Questions
Can a Faulty Radiator Cap Cause Coolant Overflow?
Yes, a faulty radiator cap can cause coolant overflow. When the cap doesn’t maintain proper pressure during radiator maintenance, it can lead to excess coolant spilling over.
You should pressure test your radiator cap regularly to make sure it seals correctly. If it fails, replacing the cap restores proper pressure and prevents overflow, protecting your engine from overheating and keeping coolant levels just right.
How Does Engine Temperature Affect Coolant Reservoir Levels?
When your engine heats up, it’s a double-edged sword. You’re playing with fire if you ignore overheating causes because engine temperature directly impacts coolant reservoir levels.
As the engine warms, coolant expands, risking overflow if the system isn’t properly vented. If the engine runs too hot, excess coolant pushes into the reservoir, which can lead to overflowing.
Keep an eye on temperature gauges to prevent this messy situation and maintain peak engine health.
Are There Specific Coolant Types Recommended for Preventing Overflow?
Choosing the right coolant types is essential for overflow prevention. You should use the manufacturer-recommended coolant, typically a specific mix of ethylene glycol or propylene glycol with water.
These coolants help maintain proper engine temperature and prevent excessive pressure buildup, which reduces overflow chances. Avoid mixing different coolant types, as incompatible fluids can cause gelling or corrosion.
This can increase the risk of overflow, so always check your owner’s manual for the correct coolant type.
Can Using Tap Water in the Coolant Reservoir Cause Overflows?
Using tap water in your coolant reservoir can cause overflows because water quality and coolant chemistry are important. Tap water often has minerals and impurities that can lead to corrosion or deposits.
These issues can affect the system’s pressure, making the coolant level rise unexpectedly. To prevent overflows, always use distilled or deionized water.
This ensures proper coolant chemistry and maintains good water quality, which helps reduce overflow risks.
How Often Should I Inspect My Cooling System for Potential Issues?
Think of your cooling system as the heartbeat of your car—you need to check it regularly. You should inspect it at least once every 6,000 miles or every six months, whichever comes first.
During inspections, look for overflow signs like puddles or a rising coolant level. Regular cooling system checks help catch problems early, which can prevent overheating and costly repairs.
Staying on top of maintenance keeps your engine running smoothly and avoids surprises on the road.
Conclusion
If your coolant reservoir keeps overflowing, it might seem like a simple fix. Some believe it’s caused by a faulty radiator cap or thermostat that traps excess pressure.
While DIY checks can help, don’t ignore persistent issues. These could be signs of deeper cooling system problems that need professional attention.
Trust your instincts and get a mechanic to diagnose if you’re unsure. Proper maintenance, including fixing coolant reservoir overflow issues, can prevent costly repairs and keep your engine running smoothly.