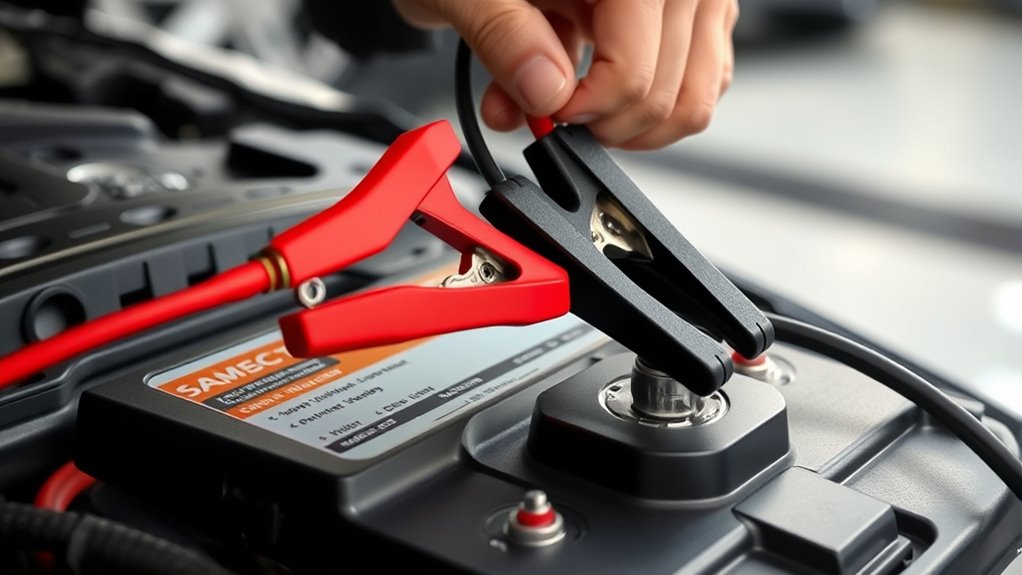
How to Use the Car Battery Charger: Step by Step Guide
Ever had your car battery die just when you need it most? You’re not alone—many people struggle with jump-starting or charging their batteries safely.
Using a car battery charger might seem straightforward, but knowing the right steps can make all the difference.
To use a car battery charger, start by inspecting your battery for damage and cleaning the terminals.
Connect the charger clamps in the correct order—positive first, then negative—making sure they’re secure.
Turn on the charger and monitor the voltage and charging progress, stopping when the battery is full.
Always unplug and disconnect the clamps safely after charging, following proper procedures.
Keep in mind these steps, and you’ll gain more tips to guarantee safe and effective charging.
Key Takeaways
- Select the right charger for your battery type and vehicle specs.
- Connect the positive clamp to the battery’s positive terminal. Then, securely attach the negative clamp.
- Plug in the charger, turn it on, and keep an eye on the charging process.
- Watch the voltage and indicator signals to know when your battery is fully charged.
- Turn off the charger, disconnect the clamps in the correct order, and do any necessary post-charging maintenance.
How Do Car Battery Chargers Work?
A car battery charger works by sending electrical energy from an external power source into your vehicle’s battery. When plugged in, the charger supplies a controlled current that interacts with the battery’s chemistry, mainly lead-acid or lithium-ion, depending on the type.
As the charger delivers power, it starts charging cycles where the battery’s chemical reactions convert electrical energy into stored chemical energy. During these cycles, the charger monitors voltage and current, adjusting its output to prevent overcharging or damage.
This process ensures the battery recharges safely and efficiently. The charger’s internal circuitry manages the delicate balance needed for different battery chemistries, helping to prolong battery life.
The charger’s circuitry balances battery chemistry, ensuring safe, efficient charging and extending battery lifespan.
As your battery charges, these cycles repeat until it reaches full capacity. Understanding how a charger interacts with battery chemistry helps ensure safe, effective charging and extends your battery’s lifespan.
Choosing the Right Battery Charger for Your Vehicle
Selecting the right battery charger depends on your vehicle’s specific needs and battery type. Different batteries like lead-acid, AGM, or gel need chargers with compatible features to ensure safe and efficient charging.
For example, if your vehicle has an AGM battery, choose a charger with a specific AGM setting to avoid damage. Consider features like adjustable voltage, amperage, and automatic shut-off to match your vehicle and prevent overcharging.
If you have a larger vehicle or want faster charging, look for higher amperage ratings. Just make sure your charger can handle your battery’s capacity. Compact, portable chargers are great for smaller vehicles, while heavy-duty models suit larger batteries.
Always check your vehicle’s manual for recommended charger specifications. Picking a charger with the right features for your battery type means safer, more effective charging.
Preparing Your Vehicle and Equipment Safely
Before you get started, it’s a good idea to check your battery’s condition. Making sure it’s safe to work on can help you avoid any unexpected mishaps.
Next, gather all the tools you’ll need—things like gloves and safety glasses. Wearing these protects you and makes the whole process safer.
Taking these simple steps can really help prevent accidents and ensure that charging your battery goes smoothly and safely.
Inspect Battery Condition
Inspecting your battery’s condition is an important first step to ensure safe and effective charging. Start by checking the overall health of the battery. Look for any signs of damage, swelling, or leaks, which could mean the battery is compromised.
Next, do a quick corrosion check around the terminals. White or bluish powder indicates corrosion and can block electrical flow. If you see corrosion, it’s best to clean it carefully before moving on.
Make sure the terminals are tightly connected and free of debris. This helps prevent safety issues and makes sure your charger works properly. Taking the time to inspect your battery helps protect both you and your vehicle during charging.
A proper check creates a solid foundation for a safe and successful charging experience.
Gather Necessary Tools
Gathering the right tools and preparing your vehicle properly can make the charging process safer and more efficient. First, confirm you have the right charger type for your battery—whether it’s a trickle charger or a fast charger.
Check that your charger is in good working condition and compatible with your battery’s specifications. You’ll also need safety gear like gloves and eye protection to prevent accidents during battery maintenance.
Keep a set of insulated tools nearby in case you need to disconnect or reconnect the battery terminals. Having a wrench or socket set ready to loosen or tighten clamps is also helpful.
Proper preparation helps prevent electrical shorts and ensures a smooth charging process. This gives you peace of mind while maintaining your vehicle’s battery health.
How to Connect Your Car Battery Charger Properly
Connecting your car battery charger correctly is essential for safe and effective charging. First, identify your battery type, as some chargers are designed specifically for lead-acid, AGM, or gel batteries. Check the charger features to confirm compatibility with your battery.
Always connect the clamps in the proper order: first, attach the positive (red) clamp to the battery’s positive terminal, then connect the negative (black) clamp to a grounded metal part of the vehicle or the negative terminal if advised. Before plugging in the charger, verify that it’s turned off.
Make certain the clamps are secure and not touching each other. Keep clear of moving parts and hot surfaces. When everything is in place, plug in the charger and turn it on.
How to Set Charging Parameters Correctly
Before you start charging, it’s important to set the right parameters on your charger to ensure safe and efficient operation. First, pick the correct charging mode based on your battery’s needs—whether it’s standard, maintenance, or fast charge. The mode you select impacts both charging speed and safety, so make sure it matches your battery chemistry, like lead-acid or AGM.
Many chargers automatically detect the battery type, but if yours requires manual input, double-check that you select the right chemistry to avoid damage. Next, adjust the voltage and current settings. A lower current is safer for older or damaged batteries, while a higher current can speed up charging for healthy batteries.
Always double-check these settings before you start. Incorrect parameters can cause overcharging, overheating, or even damage to your battery. Properly setting your charging parameters helps your battery charge safely and efficiently, reducing the risk of damage or safety hazards.
Monitoring the Charging Process and Safety Tips
When you’re charging your battery, it’s a good idea to keep an eye on the voltage levels. That way, you can make sure it’s charging correctly and avoid overcharging, which can be risky.
And don’t forget about safety! Always wear gloves and work in a well-ventilated space to keep yourself protected. Staying attentive while charging helps ensure everything goes smoothly and keeps you safe at the same time.
Monitoring Voltage Levels
Monitoring voltage levels is essential to make sure your car battery charges safely and efficiently. Keep an eye on voltage fluctuations while charging, since sudden changes can signal issues or potential damage.
Regularly check the voltmeter to ensure the voltage stays within the recommended range for your battery type. This helps keep your battery healthy and functioning properly.
Avoid overcharging by stopping the process once the voltage hits the right level. Remember, consistent monitoring can prevent damage and help your battery last longer.
Consider these tips:
- Use a reliable voltmeter for accurate readings
- Watch for sudden voltage spikes or drops
- Stop charging if voltage exceeds safe limits
- Record voltage levels periodically
- Disconnect once the ideal voltage is reached
Safety Precautions During Charging
While charging your car battery, it’s important to stay alert to safety precautions to prevent accidents and damage. Always wear protective gloves and goggles to avoid sparks or acid exposure.
Make sure your charging area is dry, well-ventilated, and free from any flammable materials. Keep the charger away from moving parts and heat sources to stay safe.
Never leave the charger unattended while it’s in use. Double-check all connections before turning it on to ensure everything is secure.
While charging, keep an eye out for any unusual heat, smells, or sparks. If you notice anything abnormal, disconnect immediately.
Following these safety tips helps prevent accidents, protects your vehicle, and ensures a safe, efficient charging experience. Always read your charger’s instructions for specific safety guidelines.
When Is Your Battery Fully Charged?
Wondering when your car battery is fully charged? You should keep an eye on the battery capacity and the charging indicators on your charger.
Usually, once the charger’s indicator shows full or something similar, your battery is ready. Just be careful not to overcharge, as that can damage your battery.
Here are some signs that your battery is fully charged:
- The charging indicator turns green or shows “full”
- The ammeter needle stabilizes at zero or a designated “full” mark
- The charging time has reached the recommended duration
- When measured with a multimeter, the battery voltage is around 12.6 to 12.8 volts
- There are no more bubbling or hissing sounds during charging
Always check the instructions for your specific charger model, since indicators and times can vary. Watching for these signs helps you charge your battery safely and efficiently.
Troubleshooting Common Charging Problems
Even with proper procedures, charging issues can still happen, but many common problems have simple solutions. One myth is that leaving the charger connected for too long will damage your battery; in reality, most chargers have automatic shut-off features to prevent overcharging and help protect battery life.
If your battery isn’t charging right, start by checking the connections. Make sure they’re clean, tight, and correct. Loose or corroded terminals can block charging efficiency. Also, double-check that the charger’s settings match your battery type and size.
If the charger still won’t start or the indicator lights aren’t working, try testing the outlet or switching to a different power source. Sometimes, the issue isn’t the charger but the battery itself, which could be deeply discharged or damaged.
Addressing these problems quickly helps keep your battery healthy and extends its lifespan. This way, you can avoid unnecessary replacements and ensure your vehicle runs reliably.
How to Disconnect Your Charger Safely After Charging
Before you unplug everything, it’s a good idea to turn off the charger first. This helps avoid any sparks or electrical problems. When you’re ready to disconnect, start by carefully removing the negative clamp, then move on to the positive. Once everything’s unplugged, make sure to store your equipment in a safe, dry spot so it’s ready to go for next time.
Turn Off Charger First
Always turn off your charger before disconnecting it from your vehicle. This step is essential for safe removal and helps keep your charger in good shape so it works properly over time.
Turning off the charger first also prevents electrical surges that could damage your battery or shorten its lifespan. When you switch off, it reduces the risk of sparks during disconnection.
Remember these tips:
- Make sure the charger is fully powered down before unplugging.
- Don’t rush to disconnect while it’s still on.
- Look for any indicator lights that show it’s shut down.
- Handle cables carefully to avoid damage.
- Store your charger properly to keep it in top condition.
Following these steps helps your battery last longer and keeps your charging equipment working well.
Remove Clamps Carefully
Gently remove the clamps from your battery terminals once the charger is turned off and no longer supplies power. Use proper battery clamp techniques to prevent sparks or damage.
Start with the negative (black) clamp, carefully lifting it away from the terminal. Then do the same with the positive (red) clamp. This order helps reduce the risk of short circuits.
Make sure your hands are dry and avoid touching both clamps at once. Keep the clamps away from metal surfaces or any conductive objects for safety.
Once both clamps are free, store them securely to prevent accidental contact. Following these steps keeps you safe and protects you from electrical hazards.
Proper technique is key for a safe and effective disconnect process.
Store Equipment Properly
Once you’ve safely disconnected the clamps, it’s important to store your charging equipment properly to ensure safety and extend its lifespan. Proper storage of batteries and chargers helps prevent damage and keeps everything ready for next time.
Keep the charger in a cool, dry place away from direct sunlight and moisture. Coil the cables neatly to avoid tangles and damage, and store the clamps in a designated container to keep them clean and prevent corrosion.
Check the charger periodically for any signs of wear or damage. Label the storage area clearly so you can quickly find your equipment when you need it. Keep the manual handy for quick reference.
Proper storage helps maintain peak performance and prolongs the life of your battery storage and charger.
Tips for Maintaining Your Car Battery After Charging
After charging your car battery, taking steps to maintain it can extend its lifespan and ensure reliable performance. Follow these tips to keep it in top shape.
Regular checks of the battery’s voltage help prevent unexpected failures. Be mindful of temperature effects; extreme heat or cold can shorten your battery’s life, so try to park in shaded or sheltered areas when possible.
Clean the terminals regularly to avoid corrosion, which can block electrical flow. Using a corrosion inhibitor spray can also help protect the terminals.
Avoid overcharging by monitoring how often you charge your battery. Consistent, moderate charging prevents damage. Also, check the overall condition of your battery, including its casing and connections.
Proper maintenance not only makes your battery last longer but also guarantees your vehicle starts reliably every time. With these simple steps, you can optimize your battery’s performance and enjoy peace of mind on the road.
Frequently Asked Questions
Can I Use a Car Battery Charger on a Motorcycle or Other Small Vehicles?
You can use a car battery charger on a motorcycle or small vehicles, but first, check the battery compatibility. Make sure the charger’s voltage matches your motorcycle’s battery, which is typically 12V.
Also, ensure the charger is suitable for smaller batteries. Use one with appropriate charging rates and avoid overcharging, which can damage the battery.
When connecting the charger, make sure to attach the clamps to the correct terminals. Doing this properly will keep your motorcycle safe and prevent any damage to the battery or vehicle.
What Should I Do if My Charger’s Indicator Lights Stay on or Flicker?
When your charger’s indicator lights stay on or flicker, it’s like a lighthouse signaling trouble. First, unplug it and check your connections—loose wires can cause flickering.
Next, try troubleshooting the indicator by inspecting for corrosion or damage. If the problem continues, consider cleaning the terminals or resetting the device.
Ignoring this issue might cause damage, so stay vigilant. Make sure your charger’s signals stay steady to keep your vehicle safe and on the road.
Is It Safe to Leave the Battery Charger Connected Overnight?
It’s generally safe to leave your battery charger connected overnight if it has an automatic shut-off feature, supporting proper battery maintenance and overnight safety.
But if it doesn’t have this feature, you could risk overcharging, which might damage your battery or even cause a fire.
Always check your charger’s instructions, make sure it’s in good condition, and never leave it unattended long-term without proper safeguards.
How Often Should I Charge My Car Battery to Maintain Optimal Performance?
Sure, you can ignore battery maintenance and charging frequency, but your car might remind you otherwise.
To keep it running smoothly, you should charge your battery every few months, especially if you don’t drive often.
Regular charging prevents battery drain and extends its lifespan. So, rather than risking a dead battery when you least expect it, stay proactive with your charging routine.
Enjoy hassle-free drives by keeping your battery in good shape!
Can I Jump-Start My Car With a Battery Charger?
You can’t effectively jump-start your car with a standard battery charger because jump-start techniques usually require a jumper cable. Instead, use a dedicated jump starter or a booster pack, which provides enough power to get your engine running.
Choose charger types suited for your needs—manual or automatic. Always follow safety precautions, connect the cables properly, and make sure both vehicles are off before you try to jump-start.
Conclusion
Now that you know how to use a car battery charger, you’re all set to give your battery a gentle boost when needed. Think of it like tending to a garden—you nurture it patiently, and it’ll reward you with reliable starts and longer life.
Just follow the steps carefully, stay safe, and keep your battery in top shape. With a little care, your vehicle will be ready to hit the road whenever you are.