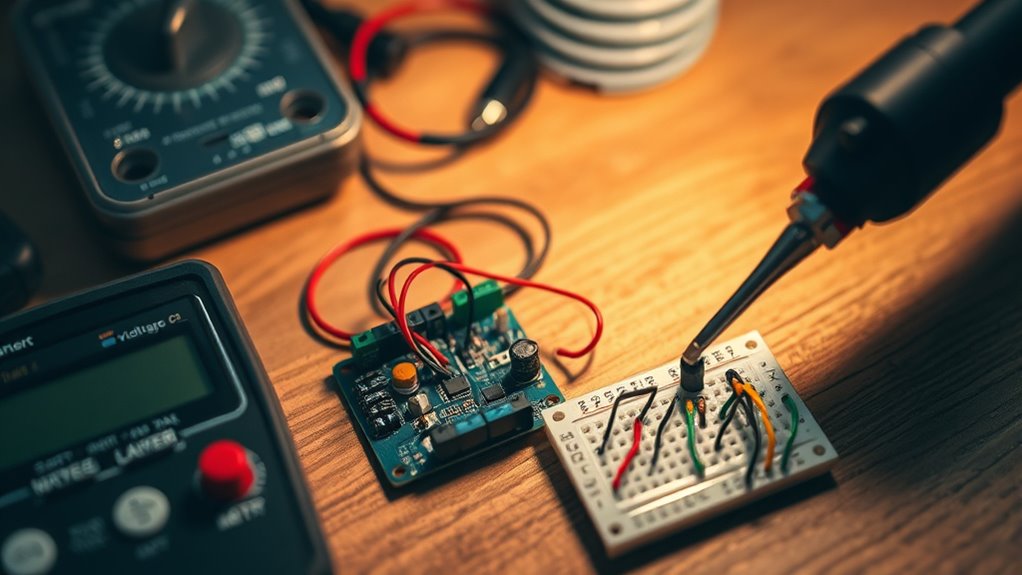
How to Make a Battery Charger: Step by Step DIY Guide
Many people struggle with finding reliable, affordable ways to charge their batteries at home. If you’re into DIY projects or just want to save money, building your own battery charger might be the perfect solution.
It’s a satisfying project that can give you more control and confidence over your electronics.
To make a battery charger, you need to understand basic electronics and select components suited for your battery type, like resistors, transistors, and diodes.
Start with designing a circuit that provides controlled current and voltage, ensuring safety features like overload protection.
Assemble your parts carefully, double-check connections, and test your charger with a multimeter.
Keep safety in mind during each step. If you follow the process closely, you’ll uncover detailed tips to build an efficient, safe DIY charger.
Key Takeaways
- Understand the different battery types and their specific charging needs so you can pick the right components and methods.
- Gather essential tools and reliable parts like resistors, diodes, and transistors to ensure safe assembly.
- Design and assemble your circuit carefully, including safety features like current limiting and thermal protection.
- Test the charger using a multimeter to check voltage, current, and make sure everything is working correctly.
- Follow safety precautions such as proper ventilation, using insulated tools, and low-voltage testing to avoid hazards.
What You Need to Know Before Building Your DIY Battery Charger
Before you start building your DIY battery charger, it’s important to understand how chargers work and what your batteries need.
Having a basic knowledge of electronics will help you understand components like resistors, transistors, and voltage regulators, which are key for safe charging.
Familiarize yourself with charging principles, such as providing controlled current and voltage to prevent damage to the battery.
Different batteries require different charging methods—some need constant current, others need constant voltage, and some need special charging cycles.
Knowing these fundamentals ensures you design a charger that operates safely and effectively.
Don’t rush into the project without understanding these concepts, as incorrect wiring or settings could cause battery damage or safety hazards.
Choosing the Right Battery Type and Compatibility
When you’re choosing a battery, it’s important to pick the right type to make sure your charger works safely and effectively. Different batteries, like lithium-ion or NiMH, have their own specific charging needs, so compatibility really matters.
Always check that your charger is designed for the type of battery you’re using. Using the wrong charger can cause damage or even safety hazards, so taking a moment to verify this can save you a lot of trouble down the line.
Battery Chemistry Considerations
Choosing the right battery type is crucial to ensure your charger works safely and efficiently. Different chemistries like lithium-ion, lead-acid, or NiMH have their own requirements.
Lithium-ion batteries, for example, need careful attention to safety because they can pose fire risks if mishandled or overcharged. Understanding electrolyte choices is important because they influence charging methods and voltage levels.
Lithium-ion batteries use liquid or gel electrolytes that require specific charging protocols, unlike sealed lead-acid types. Picking the right chemistry guarantees compatibility with your charger’s design and helps prevent damage or safety hazards.
Always research the specific battery chemistry you’re working with. Understanding its characteristics and limitations will help your DIY charger operate safely and effectively.
Compatibility With Charger
Verifying that your battery and charger are compatible is key for safe and effective use. You need to consider different charger types, as each is designed for specific battery chemistries and sizes.
Check the voltage requirements carefully. Using a charger with the wrong voltage can damage the battery or shorten its lifespan. For example, a charger made for lithium-ion batteries won’t work properly with NiMH or lead-acid types.
Always verify that the voltage output matches your battery’s specifications and make sure the connector fits securely. Compatibility also involves understanding the charging current and its limits.
Choosing the right charger type and matching the voltage ensures a safe, efficient, and long-lasting charging process. This helps prevent potential hazards or damage.
Gather Components and Tools
Before starting your project, gather all the necessary components and tools to ensure a smooth process. You’ll need reliable power sources, like a DC power supply or batteries, to provide consistent voltage and current.
Choose appropriate resistors, diodes, and transistors based on your design specs. Don’t forget essential tools like wire strippers, a soldering iron, and multimeters to test your connections.
Select the right resistors, diodes, and transistors; use tools like wire strippers, soldering iron, and multimeters for testing.
Circuit protection is important, so include fuses or circuit breakers to prevent overloads and damage. Gather insulated wires, connectors, and a breadboard or PCB to assemble your circuit securely.
Double-check component ratings to match your charger’s requirements. Having everything ready beforehand minimizes interruptions and errors during assembly.
Focus on using quality components for safety and durability. Proper preparation helps streamline your build, reduces troubleshooting, and ensures you create a reliable, efficient battery charger.
Design Your Circuit and Safety Features
When you’re designing your circuit, it’s important to plan everything out carefully to make sure your charger works smoothly. Taking the time to sketch out the diagram helps you see how all the parts fit together and catch any potential issues early on.
Don’t forget to include safety features like current limiting and thermal protection. These are crucial because they help prevent accidents, like overheating or overcurrent situations, which could damage your device or pose safety risks. By focusing on these points, you’ll end up with a charger that’s not only reliable but also safe to use.
Circuit Diagram Planning
Designing your circuit diagram is a key step in building a safe and effective battery charger. Take the time to carefully plan the circuit components, making sure they match the voltage and current requirements.
Choose connection types—like series or parallel—that best suit your battery’s needs for safety and efficiency. A clear diagram helps prevent wiring mistakes and makes troubleshooting easier.
Use standard symbols for resistors, diodes, and transistors, and label each connection clearly. Consider adding safety features like a fuse or circuit breaker to protect your circuit.
Highlight the power source and charging terminals to make the layout easy to understand. Here’s a simple overview:
| Circuit Components | Connection Types | Safety Features |
|---|---|---|
| Resistors | Series | Fuse |
| Diodes | Parallel | Circuit Breaker |
| Transistors | Combination | Overcharge Protection |
| Voltage Regulator | ||
| Charging Terminals |
Incorporate Safety Mechanisms
Incorporating safety mechanisms into your circuit is essential to protect both the charger and the batteries you’re working with. You need to include features that prevent damage and guarantee safe operation.
Use voltage regulation and current limiting to keep the charging process steady and prevent overcharge. These help ensure the batteries are charged safely and efficiently.
Integrate thermal management components like heat sinks or fans to avoid overheating during operation. Managing heat helps keep your charger and batteries safe from damage.
Add protection circuits such as short circuit protection and battery protection to avoid potential hazards and damage. These safeguards are key to a reliable and safe charging setup.
These safety features help manage risks like overcharging, short circuits, and excessive heat. By designing with these mechanisms, you guarantee your charger operates safely and reliably, extending the lifespan of both your charger and batteries.
Assemble Your Battery Charger Step-by-Step
Gather all the necessary components—circuit board, transformers, diodes, resistors, and connectors—and lay them out in a clean workspace. This keeps you organized as you assemble your battery charger.
Pay attention to your target battery types because different batteries like Li-ion or NiMH need specific charging rates. Use the table below to double-check the parts and their functions:
| Component | Function |
|---|---|
| Circuit board | Hosts the control circuitry |
| Transformer | Converts voltage to a suitable level |
| Diodes | Allow current flow in one direction |
| Resistors | Regulate current and voltage |
| Connectors | Link components to batteries |
Follow your schematic carefully and connect the components step-by-step. Make sure all connections are secure.
Proper assembly guarantees your charger will safely handle various battery types and charging rates, preventing damage or hazards.
Safely Test Your DIY Battery Charger
Before you turn on your DIY battery charger, make sure you have the right testing gear, like a multimeter. It’s a good idea to keep an eye on the voltage and current levels while testing—this helps prevent overcharging or damaging your batteries.
And don’t forget to stay alert for any safety hazards, such as sparks or overheating. Those little things can make a big difference in keeping your testing process safe and smooth.
Use Proper Testing Equipment
To guarantee your DIY battery charger works safely and effectively, you need to use proper testing equipment. First, a multimeter is essential for testing voltage regulation, current limits, and circuit integrity.
Second, familiarize yourself with multimeter usage to accurately measure battery safety parameters and identify issues. Reliable testing equipment helps you troubleshoot techniques, ensuring the charger maintains appropriate charge cycles without overcharging or damaging batteries.
Using the right tools allows you to verify that your circuit operates within safe voltage and current ranges. Proper testing not only confirms the effectiveness of your charger but also prolongs battery life and prevents hazards.
Always double-check readings and adjust your circuit as needed to maintain peak performance and safety.
Monitor Voltage and Current
Monitoring voltage and current during testing is crucial to ensure your DIY battery charger works safely and effectively.
Keeping an eye on voltage helps make sure the charger provides the right level without overcharging, which could damage the battery.
Use a multimeter to constantly check the voltage output and make adjustments if needed.
Regulating current is just as important; it prevents too much current from flowing, which could harm the battery or other components.
Watch the current draw during charging, especially at the start or if you notice anything unusual.
Monitoring these parameters early helps catch issues before they become serious and keeps everything running safely.
Staying attentive to voltage and current readings throughout testing ensures your homemade charger operates smoothly and safely.
Observe for Safety Hazards
Keep a close eye on safety hazards as you test your DIY battery charger to prevent accidents and damage. First, watch for fire hazards—overheating components can ignite, so monitor temperature and make sure your workspace has proper ventilation.
Second, be cautious of electrical shock. Avoid touching live parts and unplug the charger before making any adjustments. Check your wiring connections for loose or exposed wires that could cause shorts or sparks.
Always use insulated tools and wear protective gear to stay safe while working. Test your charger with a low-voltage battery first to catch any issues safely.
Troubleshoot Common Issues
When your battery charger isn’t working properly, quickly figuring out the problem can save you time and frustration. Common issues usually come from loose connections, overheating, or wrong voltage. Check for loose wires or corroded contacts, as these can interfere with the circuit.
Overheating might mean there’s an overload or poor cooling, which can slow down charging or cause damage. Make sure the charger isn’t overloaded and that cooling is adequate. User mistakes like incorrect wiring can also damage the battery or make charging less efficient.
Use this simple troubleshooting guide:
| Issue | Possible Cause | Solution |
|---|---|---|
| Slow charging | Faulty connections | Tighten or replace wiring |
| Overheating | Overloaded circuit | Reduce load or improve cooling |
| Inconsistent voltage | Faulty components | Replace defective parts |
| No power or errors | User error or circuit break | Check wiring, reset, or test parts |
Diagnose step-by-step to ensure your charger works safely and correctly.
Customize Your Charger for Different Batteries
To effectively customize your charger for different batteries, you need to adjust the voltage and current settings to match each battery’s specifications. This guarantees safe and efficient charging, preventing damage or reduced battery life. First, review the battery’s datasheet to determine the recommended voltage and current.
Next, consider custom charger designs that allow easy adjustments. This makes switching between different batteries much simpler. Finally, make precise battery capacity adjustments by setting the charging current proportional to the battery’s capacity, usually around 0.5C to 1C.
For example, adjust the voltage to match the battery’s full charge voltage. Set current limits based on battery capacity to ensure safe charging rates. Monitor and tweak settings as needed for different battery types like Li-ion or NiMH.
Tips for Safe and Efficient Charging
Properly setting your charger for different batteries is just the first step; guaranteeing safe and efficient charging requires careful attention during the process. Use proper charging techniques, like monitoring voltage and current to prevent overcharging, which can damage the battery.
Always start with the recommended settings for each battery type and avoid rushing the process. Keep an eye on the temperature; if the battery gets excessively hot, disconnect it immediately to prevent safety hazards.
Always follow recommended settings and disconnect if the battery becomes too hot to ensure safety.
To maximize battery lifespan, don’t leave batteries charging for too long once they’re full. Regularly check your charger connections to ensure they’re secure and free of corrosion.
Using a timer or automatic shutoff feature can help prevent overcharging and extend your battery’s life. Remember, patience and attentiveness during charging help maintain battery health, improve safety, and guarantee peak performance over time.
Following these tips guarantees your batteries stay safe and last longer.
Maintain and Upgrade Your Battery Charger
Regular maintenance and upgrading your battery charger guarantee it operates safely and efficiently over time. To keep your charger in prime condition, focus on three key steps.
- Perform regular battery maintenance: Check connections for corrosion or dirt, and clean terminals as needed. Proper contact ensures peak charging and prevents damage.
- Inspect and replace worn parts: Examine wires, fuses, and switches periodically. If you notice signs of wear or damage, upgrade these components to maintain safety and performance.
- Implement charger upgrades: Upgrade outdated parts, like adding new control modules or cooling systems, to boost efficiency and extend lifespan. Staying current with upgrades helps your device adapt to new battery types or higher demands.
Consistent battery maintenance and strategic upgrades improve your charger’s longevity and reliability, guaranteeing safe and effective charging every time.
Frequently Asked Questions
Can I Build a Universal Battery Charger for All Battery Types?
You can build a universal battery charger, but making it truly compatible with all battery types is tough because of the different chemistries and voltages involved.
To ensure safe and efficient charging, focus on adjustable voltage and current settings, and include features like auto shut-off.
While designing a versatile charger is possible, keep in mind that optimizing charging for each battery type requires selecting the right components and settings specific to each chemistry.
What Are the Signs My DIY Charger Is Overcharging?
You’ll notice overcharging symptoms like battery swelling, excessive heat generation, and voltage fluctuations.
The charging might take longer than usual, and warning lights could turn on.
If your DIY charger doesn’t have circuit protection, these signs can get worse, risking damage to the battery and shortening its lifespan.
Always keep an eye on heat and swelling, and think about adding safety features to prevent overcharging.
This way, your batteries stay safer and last longer.
How Long Does It Typically Take to Fully Charge a Battery?
Imagine you’re excited to use your new charger, but your friend’s battery with a 2000mAh capacity takes about 2 hours to fully charge, depending on the charging speed.
Typically, it takes 1 to 4 hours to charge a battery, depending on its capacity and the charger’s output. Larger batteries with higher capacities will usually take longer.
Using a charger with a higher charging speed can speed up the process without harming the battery.
Is It Possible to Incorporate Solar Power Into My Charger Design?
Yes, you can definitely incorporate solar panels into your charger design. It’s a smart way to use renewable energy and boost charging efficiency, especially when you’re outdoors or off the grid.
Just make sure to choose the right solar panel and pair it with a compatible controller. That way, you’ll ensure maximum power transfer and protect your battery from overcharging.
Keep in mind that sunlight conditions can affect how fast your device charges. Plan accordingly to get the best efficiency and keep your battery safe.
What Safety Precautions Should I Take During Long-Term Use?
Taking safety precautions is like shielding yourself under a sturdy umbrella on a stormy day.
You should regularly check your charger for proper battery maintenance and avoid fire hazards.
Make sure voltage regulation and circuit protection are in place to prevent overcharging or short circuits.
Also, inspect connections frequently, and never leave the charger unattended during long-term use.
These steps keep you safe and help extend your charger’s lifespan.
Conclusion
Now, imagine yourself confidently assembling your custom battery charger, sparks flying gently, wires humming with energy.
As you finish, a sense of accomplishment sparks within you, like a well-tuned engine ready to power your devices.
With your new DIY battery charger, you hold the power to breathe life into tired batteries, fueling your projects and passions.
Mastering this skill not only boosts your creativity but also builds your confidence, one charge at a time.